
AI Image Editing Prompts: How to Get the Changes You Want Without Ruining the Original
Edit models protect what you name and improvise on the rest. What AI image editing does reliably, where it breaks, and how to write the instruction.
You ask an AI model to change a jacket to red. The jacket turns red, but so does the scarf. Worse, the person's face looks slightly different.
This is one of the biggest challenges in AI image editing: getting the model to change what you want without altering everything else. Unlike traditional editing tools, AI models interpret your instructions and regenerate parts of an image to produce the requested result. They can change an object's colour, replace a background, adjust lighting, or edit text, but they don't always preserve details you didn't explicitly mention.
The solution starts with understanding how instruction-based image editing works, knowing which edits models handle reliably, and writing prompts that clearly define both what should change and what should stay the same. This guide covers practical techniques for writing better AI image editing prompts, avoiding common mistakes, and integrating image editing into an application. If you're generating images from scratch instead, see our guide to writing prompts for AI image models.
How AI Image Editing Prompts Work
Instruction-based AI image editing lets you modify an existing image using natural language. You provide a source image and a prompt describing the desired change, and the model generates an edited version. For example, you might upload a portrait and write:
Change the jacket to deep red leather. Keep the person's face, hair, pose, background, and lighting exactly the same.
The model interprets the instruction, identifies the relevant parts of the image, and generates an output that attempts to preserve the original while applying the requested changes. However, preserving the original is not always guaranteed. Many image editing models regenerate image content rather than making precise, isolated pixel changes. As a result, details you didn't explicitly protect may change, including facial features, logos, textures, and background elements. Some models are better at preserving unmodified regions than others, but the degree of control varies by model and task.
To understand where instruction-based editing fits, compare it with two other approaches:
| Approach | What you provide | Best for | Main limitation |
|---|---|---|---|
| Instruction-based editing | An image and a natural-language prompt | Changing objects, colours, materials, lighting, backgrounds, and text | Unintended changes to other parts of the image |
| Mask-based inpainting | An image, a mask, and a prompt | Targeting a specific region for modification | Requires a mask, which some models may not follow precisely |
| Image-to-image generation | A reference image and a prompt | Creating new images inspired by an existing composition or style | Less reliable preservation of the original image |
Masks provide an additional way to control where edits occur, but they aren't always strict boundaries. Some models treat masks as guidance rather than following their exact shape. On the AVIS image generation endpoint, there is no mask field. Instead, you provide the source image and editing instructions through the same content array used for image generation. This makes prompt quality particularly important when you're using a model that relies on natural-language instructions to determine what changes.
What AI Image Editing Can and Cannot Do Reliably
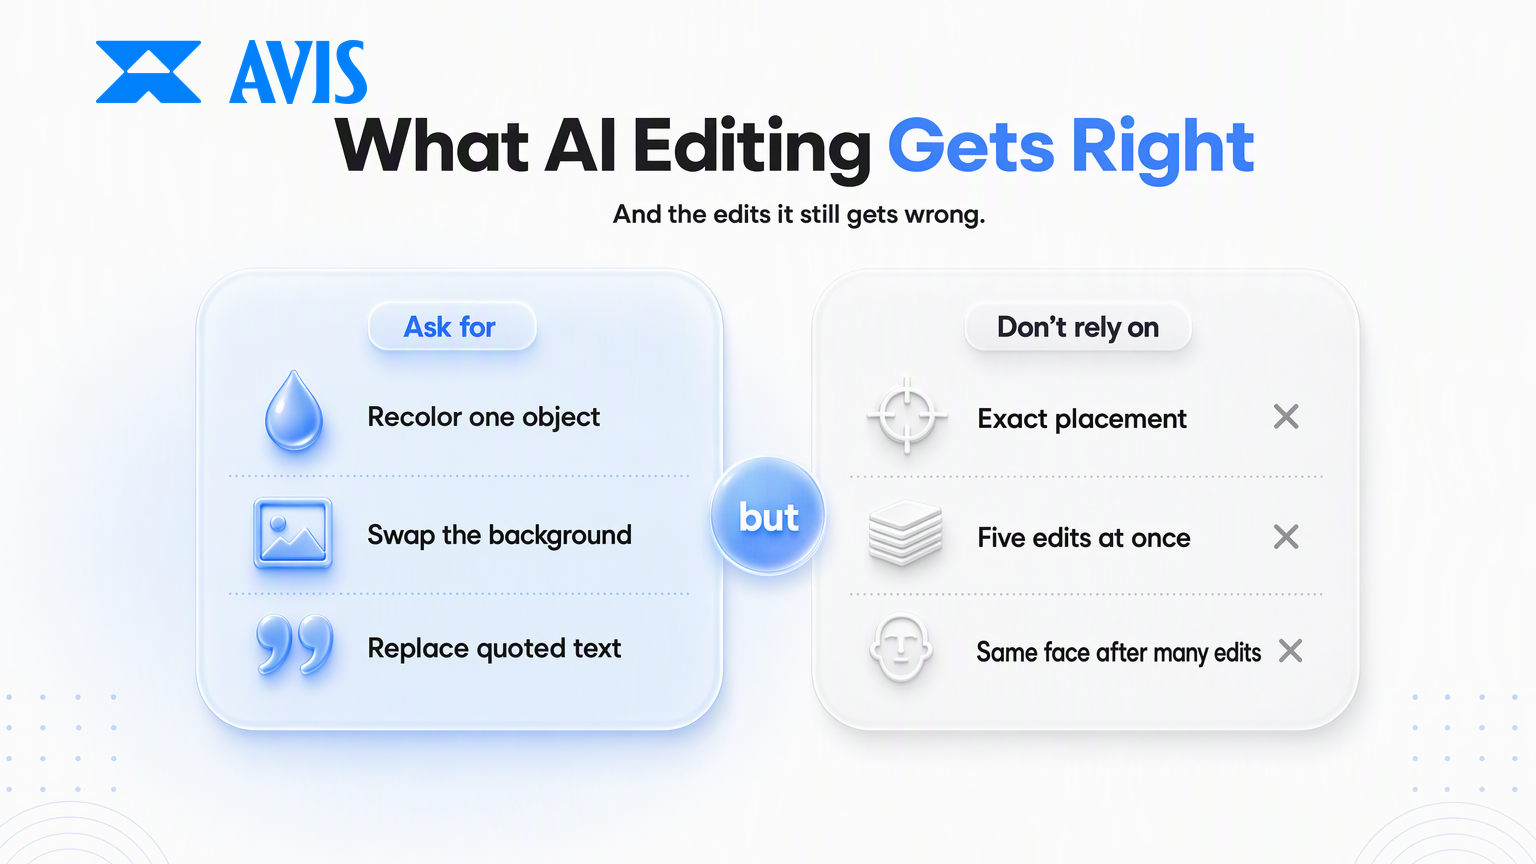
AI image editing models are generally better at making clear, isolated changes than performing multiple precise modifications in one request. The following table summarizes common capabilities and limitations, although actual results depend on the model, source image, and complexity of the instruction.
| Usually works well | Less reliable |
|---|---|
| Changing the colour of a clearly identifiable object | Preserving every unmentioned detail perfectly |
| Changing an object's material, such as leather to denim | Applying every change in a long list of instructions |
| Replacing or modifying a background | Removing unwanted objects without affecting nearby details |
| Applying a new artistic style to an image | Positioning an object at an exact coordinate or size |
| Adjusting lighting or time of day | Preserving facial identity across repeated edits |
| Replacing short text on signs or labels | Rendering long text with perfect spelling and formatting |
| Adding objects that fit a simple scene | Matching complex perspective, lighting, and shadows perfectly |
| Changing the camera angle in supported models | Maintaining image quality through long editing sequences |
Edits That Usually Work Well
The most reliable edits have two characteristics: a clearly identified target and a specific desired change. For example, instead of simply asking to change a car's colour, you could write:
Change the car to deep red while preserving its shape, reflections, wheels, and position.
The model knows which object to modify and which properties to retain. Other common editing tasks include colour changes, material changes, object replacement, background replacement, style transformation, and lighting adjustments. Some models also support more advanced operations, such as changing camera angles, relighting a scene, or replacing text while preserving its surrounding design. These capabilities can be useful, but their reliability varies; a simple colour change is generally easier to control than changing the camera angle of a complex photograph.
Text editing has also improved. Several models can replace short phrases on signs, labels, and posters while retaining much of the original design, especially when the old and new text are explicitly identified.
Where AI Image Editing Breaks Down
Unmentioned details change. You ask the model to change a person's shirt, but the face, hairstyle, or background changes too. This happens because the model may regenerate more of the image than necessary. If preserving identity is important, explicitly instruct the model to keep the face, expression, hairstyle, and pose unchanged.
The model ignores part of a complex instruction. A prompt asks for five changes, but the output includes only three. Long instructions can be difficult for models to follow consistently, particularly when several changes interact. Instead of combining every modification into one request, break the task into smaller steps.
Object removal produces unexpected results. Instructions such as "remove the clutter" can produce inconsistent results. The model may remove some objects while leaving others or introduce unwanted changes to the surrounding area. Describe the intended final state instead: "Create a clean, empty desk with a smooth wooden surface. Preserve the desk's shape, position, and lighting." This gives the model a clearer target, although it still doesn't guarantee perfect results.
Precise positioning is difficult. Most instruction-based models aren't designed for exact coordinate-level control, such as positioning a logo exactly 20 pixels from the upper-left corner. If precise positioning is essential, use a conventional image editor, a layout engine, or a workflow that supports explicit coordinates and layers.
Repeated edits reduce image quality. Each editing pass can introduce small changes to the image. Over multiple iterations, these changes may accumulate into visible artifacts, distorted details, or a gradual loss of fidelity. One model's documentation reports visible artifacts after approximately six sequential edits to the same image. This is model-specific rather than a universal limit, but it illustrates why long editing chains require quality checks.
Added objects look unnatural. A newly inserted object may have inconsistent lighting, perspective, scale, or shadows. For example, adding a coffee cup to a table may produce an object that looks pasted onto the scene rather than naturally integrated. To improve the result, describe how the object should relate to its surroundings, including its position, viewing angle, lighting direction, and shadows.
How to Write Better AI Image Editing Prompts
A good editing prompt does more than describe the desired change. It also establishes boundaries around what the model should preserve. A useful starting point is to include three elements: the requested change, preservation instructions, and a single editing objective. Avoid re-describing the entire image unless necessary. The model can already see the source image, and an overly detailed description may encourage it to reinterpret elements that don't need modification.
1. Identify the Object and the Desired Change
Be specific about the object, its relevant properties, and the intended result. Instead of writing "Make the jacket look better," try:
Change the jacket to deep red leather with a natural texture and realistic highlights.
The second instruction defines a target, a colour, and a material. For more complex edits, specify the relevant part of the object: "Change only the sleeves of the jacket to black leather. Keep the body of the jacket dark blue denim." This reduces ambiguity when multiple objects or regions share similar colours or materials.
2. Tell the Model What to Preserve
A common mistake is describing only what should change. If the source image contains important details, explicitly state which ones must remain consistent. For example:
Change the jacket to deep red leather. Preserve the person's facial features, expression, hairstyle, pose, body proportions, background, and lighting.
Prioritize the details that matter most to your use case. For a product photograph, these might include the product's shape, logo, proportions, and camera angle. For a portrait, facial identity and expression may be more important. Preservation instructions improve clarity, but they aren't absolute guarantees. If the model repeatedly changes a critical detail, consider using a mask, layers, or a different editing approach.
3. Make One Change Per Request
When possible, treat image editing as a sequence of small, controlled operations. Consider this instruction:
Make the scene look like winter, remove the people, replace the shop sign text with CLOSED, and make the image more cinematic.
It combines four different tasks. The model might complete some and overlook others, or produce unwanted changes while trying to satisfy them all. A more controlled workflow separates the edits into three passes.
Pass 1: Change the season
Change the scene to winter by adding snow to the ground, rooftops, and parked cars. Preserve the buildings, street layout, and camera angle.
Pass 2: Remove the people
Make the street empty of people. Preserve the snow, buildings, cars, and existing lighting.
Pass 3: Replace the sign text
Replace 'OPEN' with 'CLOSED' on the shop sign. Preserve the original font, colour, size, and position. Keep everything else unchanged.
This approach makes each result easier to evaluate. If one edit fails, you can retry that step without asking the model to redo the entire image. There is one trade-off: every additional pass can introduce visual drift. Use separate passes when they improve control, but avoid unnecessary iterations.
4. Describe the Final State Instead of Using Vague Commands
Instructions such as "make it nicer," "clean this up," or "remove the unwanted elements" leave too much room for interpretation. Whenever possible, describe the actual result you want.
| Vague instruction | More specific instruction |
|---|---|
| Make the image brighter | Increase the overall exposure slightly while preserving highlights and natural skin tones |
| Make the background cleaner | Replace the background with a plain light-gray wall |
| Make the product look premium | Use soft studio lighting, subtle shadows, and a neutral background while preserving the product's shape and branding |
| Remove the clutter | Create a clear desk with only a laptop and a notebook remaining |
| Make it more cinematic | Apply cinematic color grading with cool shadows, warm highlights, and moderate contrast |
Specific instructions give the model a more concrete target and make the output easier to evaluate.
5. Match New Objects to the Existing Scene
When inserting an object, describe more than the object itself. Consider its position, scale, perspective, lighting, and shadows. For example:
Add a ceramic coffee mug to the right side of the table. Match the camera angle and perspective of the table, with soft window light coming from the left and a natural shadow falling to the right.
This provides more context than simply asking the model to add a mug and helps it integrate the new object into the existing scene.
Special Cases: Text Editing and Multiple Images
Some editing tasks need additional instructions beyond the basic change-and-preserve structure.
Editing Text in an Image
Text is particularly sensitive to spelling, formatting, and placement. A model may understand the requested wording but render the wrong letters, alter the font, or change the layout. A useful prompt format is:
Replace 'OLD TEXT' with 'NEW TEXT'. Preserve the original font style, colour, size, alignment, and position.
For example:
Replace 'OPEN' with 'CLOSED'. Keep the original uppercase lettering, red colour, font style, and position on the shop sign.
Keep the replacement text short whenever possible. Quoting the exact old and new wording reduces ambiguity, although it doesn't guarantee perfect typography. If the new text needs to move or change size, some models support visual annotations. You can draw a bright-coloured box on the source image to indicate the intended location, provided the model supports this workflow.
For production applications that require exact typography, consider rendering the text separately using a conventional graphics library or image editor. This gives you precise control over spelling, font, size, and position.
Editing with Multiple Input Images
Some models accept multiple source images, allowing you to combine elements from different references. For example, you might want to place furniture from one photograph into a different room. Instead of writing "Put the sofa in the living room," try:
Take the gray sofa from image 2 and place it against the back wall of the living room in image 1. Match the room's perspective, lighting, and shadows. Preserve the existing furniture and room layout.
Explicitly identifying each image and its role helps prevent the model from mixing up the references or combining the scenes in unintended ways. Supported image counts vary by model, so check the model's capabilities before building a feature that depends on multiple inputs.
Building AI Image Editing into an Application
When image editing becomes part of an application, prompt quality is only one consideration. You also need to manage repeated edits, inconsistent outputs, model selection, and generation costs. Three practices can help make an editing workflow more reliable.
Chain Edits While Preserving Quality
On AVIS, each generated output returns an assetId that you can pass as imageAssetId in a subsequent request. This lets you build an editing sequence without uploading the image again at every step.
A typical workflow involves submitting the original image with the first editing instruction, receiving the edited result and its assetId, passing that asset ID into the next request, and repeating until the image meets your requirements. Save intermediate results so you can return to an earlier version if quality deteriorates. Include preservation instructions in every request rather than assuming the model will retain constraints from previous prompts automatically.
For applications that accept user-written instructions, you can also append a standard preservation clause in your application code. For example, a user might enter "Change the jacket to deep red leather," and your application could expand it to:
Change the jacket to deep red leather. Preserve the person's facial features, expression, hairstyle, pose, background, and lighting. Do not modify unrelated objects.
This makes it easier for users to request edits without needing to understand prompt engineering. However, preservation clauses should be adapted to the task. A generic instruction to preserve everything may conflict with requests to change the background, lighting, or composition.
Use More Precise Controls When Prompts Aren't Enough
Natural-language instructions are convenient, but they aren't always the right tool for every editing task. Depending on the model and workflow, consider the following alternatives.
Annotation boxes: Use visual markers to identify the region that needs editing. This can help with targeted modifications or text placement when the model supports annotated inputs.
Masks: Masks can restrict editing to a selected region. They're useful when you need to modify one part of an image while protecting the surrounding areas. However, some models interpret masks as guidance rather than strict boundaries, so inspect the output to ensure the edit stays within the intended region.
Layer decomposition: For workflows that require more control over individual elements, AVIS supports layerDecomposition: true on a compatible model. This feature separates an image into a base image and up to 16 individual element layers, each with positional information. You can then work with those elements separately rather than relying entirely on a model to preserve the original composition. Each layer is billed as a separate image, and the number of layers isn't known in advance, so a standard cost estimate cannot predict the full cost of decomposition.
If you prefer a visual workflow, the Image editor in the Image Node in AVIS Creative Studio provides tools including Layer Decomposition, Edit Text, Relight, Angles, Remove Background, and Color Grading alongside the model selector. These tools can be useful when a natural-language instruction alone doesn't provide enough control.
Test Different Models and Estimate Costs
Two image editing models can interpret the same instruction differently. One might preserve facial features more reliably, while another might produce better object replacements or text edits. Before selecting a model for production, create a small test set covering different image types.
| Test image | Editing task | What to evaluate |
|---|---|---|
| Portrait | Change clothing colour | Facial identity, expression, and hairstyle preservation |
| Product photograph | Change the product's material | Shape, branding, texture, and reflections |
| Street scene | Replace sign text | Spelling, typography, and layout preservation |
| Interior photograph | Add a piece of furniture | Perspective, scale, lighting, and shadows |
Run the same instructions across candidate models and compare both the requested changes and any unintended differences. AVIS provides a range of models that accept images and return edited images. You can filter the model list using inputModalities=image&outputModalities=image, then change the model field to compare candidates.
If a model offers a guidance or instruction-adherence setting, test different values rather than assuming the highest setting is best. One model's documentation recommends a moderate setting for general editing and warns that higher values can introduce artifacts.
Cost matters, too. Repeated editing attempts can quickly become expensive if a model frequently misses the intended result. Before running a new configuration, send the request to POST /api/v1/image/estimate. The endpoint returns the expected cost without deducting credits. Requests that fail because of infrastructure issues on our side aren't charged, as explained in our API pricing guide.
Finally, if your application accepts user-uploaded images, make sure you have the necessary rights to process them. Check whether the model adds invisible watermarks or applies other output restrictions before deploying the feature.
FAQ
What is instruction-based AI image editing?
Instruction-based image editing lets you modify an existing image using natural-language prompts instead of manually selecting pixels or painting a mask. You provide an image and describe the desired change, such as changing a jacket's colour or replacing the background. The model generates an edited image based on the instruction, but it may also change details you didn't explicitly mention.
How do I edit an image with AI without changing the face?
Include an explicit preservation instruction in your prompt. For example:
Change the shirt to white. Preserve the person's facial features, expression, hairstyle, and pose exactly as they appear in the original image. Do not modify the background or other clothing.
Make one primary change per request and repeat important preservation instructions during subsequent edits. These techniques reduce ambiguity, but if facial identity must remain pixel-perfect, use a workflow that provides more precise control over the unmodified regions.
Why does AI ignore parts of my editing prompt?
Image editing models can struggle with long instructions containing multiple independent changes. They may complete some tasks while overlooking others or produce an output that compromises between conflicting instructions. Break complex edits into smaller requests, specify the target of each change, and evaluate the output before proceeding.
Can AI edit text in an image without changing the design?
Yes, some models can replace short text while preserving much of the original design. For better results, quote both the old and new text and specify which properties should remain unchanged, including font style, colour, size, and position. If precise spelling and typography are essential, consider rendering the text separately with a conventional image editing tool.
Do I need a mask to edit an image with AI?
Not necessarily. Instruction-based editing is often sufficient for changing object colours, materials, backgrounds, and lighting. Masks become more useful when you need to constrain an edit to a particular region. However, not every model supports masks, and some don't follow their boundaries precisely. Choose the approach based on how much control the task requires.
How many AI image edits can I make before quality degrades?
There is no universal limit. Quality depends on the model, the source image, and the types of edits being performed. Repeated generations can introduce artifacts and gradually change details from the original. One model's documentation reports visible artifacts after approximately six sequential edits, but other models and workflows may behave differently. Save intermediate outputs, evaluate quality after each pass, and return to an earlier version when further editing starts to degrade the image.
How can I reduce the cost of AI image editing?
Start with a model suited to your task, keep prompts focused, and avoid unnecessary editing passes. Test different models against a consistent set of images before choosing one for production. Use cost estimation endpoints before generating, and save intermediate outputs so you can retry from a suitable version rather than restarting the entire workflow.
Wrapping Up
AI image editing works best when you clearly define what should change and what must remain untouched. Start with one specific change, identify the relevant object or region, and include preservation instructions for important details. Describe the intended final state instead of relying on vague commands, and split complex edits into manageable steps.
For application developers, the same principles extend to workflow design: chain edits using asset IDs, save intermediate outputs, test models against realistic examples, and estimate costs before running requests. When natural-language instructions aren't precise enough, consider masks, visual annotations, or layer-based editing.
With AVIS, you can use the same image generation endpoint and API key for supported image editing workflows, compare models, and estimate request costs before generating.
Last updated: October 2026